Bathroom Extractor Fan for ESPHome
Simple ESPHome based Smart Bathroom Extractor Fan that can react to humidity and human presence, while also interfacing with Home Assistant.
Installation
Create a new project in ESPHome, and copy the Bathroom-fan.yaml file content into it. Adjust for your specific hardware.
Configuration
Depending on your final wiring, you may need to change the pin allocations. If using a different board, it is recommended to avoid pins 01, 02, 03, and 08, which are only used on the ElectroDragon board due to limited physical options.
substitutions:
  deviceName: "Bathroom Fan"
  deviceLowerCaseName: "bathroom-fan"
  deviceComment: "ElectroDragon Extractor Fan"
  # Onboard status LED
  pinStatusLED: "10"

...

# One pin can be switched to 5v out signalling, which we use for the Fan PWM signalling
  pinWS28xx: "09"
# We need pins for: IR sensor, Fan RPM sensor, and i2c (SDA+SCL)
  pinPIR: "01"
  pinRPM: "03"
  pinSDA: "02"
  pinSCL: "08"
Hardware
The project is based around the ElectroDragon LED Controller board, but any ESP32 (incl C3, S2, S3) boards capable of handling 5v and either 12v or 24v can be used. Make sure to match the Fan Voltage to the Power Supply and to the ESP32 board if using the ESP32 to control power to the fan.
- ESP32-C3 board - ElectroDragon LED Controller
- AM312 Mini PIR Sensor - AliExpress
- SHT3x/SHT4x Humidity Sensor - AliExpress
- Noctua NF-F12 iPPC-24V-2000 IP67 - Amazon / AliExpress
- 4-Pin Fan Extension Cable - Amazon / AliExpress
- 24 Volt Power Supply - Amazon / AliExpress
- Dupont Connectors - Amazon / AliExpress
Please make sure you use a fan that can handle being in a humid environment and being (nearly) constantly running. Noctua's PPC range should manage this, with IP52 and IP67 ratings.
(All links are without referral codes/commission references)
LED Controller
You can find more information about the board here

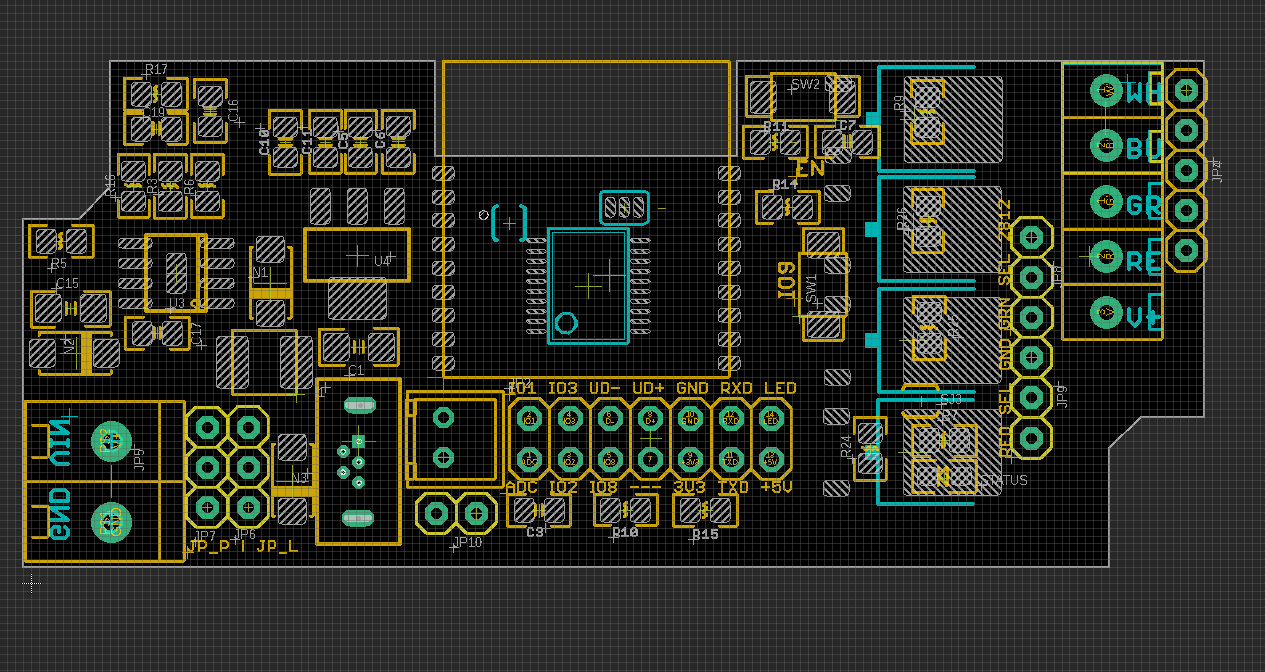
To get 5v for the PWM signal to the fan, set Jumper 08 to "2812". This switches the Green terminal from being controlled by pin 06 to pin 09, and limits it to 5v. By also setting Jumper 09 to "GND", we change the Red terminal to be a common ground.
Wiring
As the AM312 Mini IR sensor, and the SHT3x/SHT4x Temperature and Humidity sensor both need to connect to the 3.3v and GND pins on the LED Controller's pin header, simplest is to create a shared wiring harness for them. If using a single 2x7 Dupont connector, you can also add the fan's RPM/TACHO sensor to it, but please see the note on this further down.
To connect both sensors to 3.3v and GND, make small Y-splitters and use heat-shrink tubing to insulate them.
AM312 Mini IR Sensor
AM312 Mini IR sensors should usually be connected directly to 3.3v and GND, which can be found on the LED Controller's pin header. The Out signal (middle pin) connects to Pin 01 (or pinIR).
SHT3x or SHT4x
SHT3x and SHT4x units should usually be connected directly to 3.3v and GND, which can be found on the LED Controller's pin header. Connect SCL to Pin 08 (pinSCL) on the header, and SAA to pin 02 (pinSDA).
Fan
If using the ElectroDragon LED Controller, connect one end of the Fan Extension cable to the fan, and remove the connector at the other end of the Fan Extension cable. The exposed wires should be Blue, Green, Yellow, and Black
- Blue connects to Green terminal on the board
- Green (optional) connects to pin 3 on headers*
- Yellow connects to V+ terminal, or directly to the V+ on the power in terminals
- Black connects to Blue terminal to control power to the fan, or Red terminal (requires Jumper 09 to be set to "GND")
If using a different controller board with a fan-header, connect the fan directly and update either the variables pinRPM, and pinWS28xx, or the pin definition in the Fan Setup section of the configuration.
Note: The RPM or TACHO signal on the green wire from the fan should be safe to connect to an input pin via a pull-up resistor. So far, testing this has only resulted in fried controllers, so for now you might consider not connecting this wire.
images
Contributing
Pull requests are welcome. For major changes, please open an issue first to discuss what you would like to change.
Please make sure to update tests as appropriate.